Initializing the camera
Enabling the camera
On Raspbian 12, the camera is enabled by default. However, if not enabled, follow these steps:
- Open the Raspberry Pi Configuration tool by running
sudo raspi-configin the terminal. - Navigate to
Interfacing Optionsand selectCamera. - Select
Yesto enable the camera.
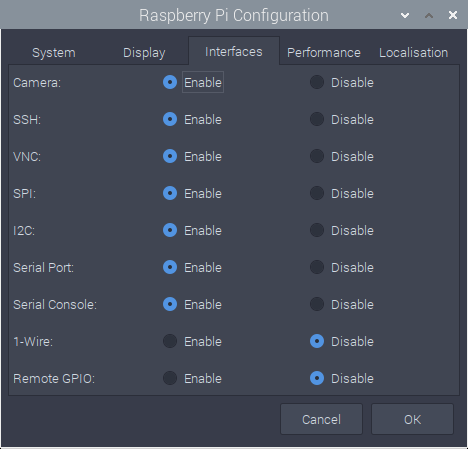
You can also enable the camera from the graphical interface:
- Open the Raspberry Pi Configuration tool from the main menu.
- Navigate to
Interfacesand selectCamera. - Select
Enabledto enable the camera.
Verifying if the camera is enabled
To verify if the camera is enabled, run the following command in the terminal:
bash
vcgencmd get_cameraIf the camera is enabled, you will see the following output:
supported=1 detected=1If the camera is not detected, you will see the following output:
supported=0 detected=0In this case, check the camera connection and try again. In some cases, you might get this output but the camera will still work. Make sure to test thoroughly.